Adding a tour or patrol mode to Unifi G5 PTZ using Home Assistant
Let's add a missing feature to Unifi PTZ using Home Assistant Automations

One glaring thing that is missing from the inexpensive Unifi PTZ camera is a tour mode or Patrol Mode. A tour mode is when it's idle that the camera would just tour the viewable area and look around to see if it detects anything if it does break out of the tour and follow the thing it detected. I hear that the much more expensive version does have this tour feature. Before putting eyes on the back of this things head lets see how to make a patrol mode work using home assistant.
Setting up presets for the tour
Unifi PTZ uses 9 presets you can switch between to move the camera to preset places using pan tilt and zoom. These presets can be access manually using the Protect camera view interface. There is no other place you can control this other than that location either in the web interface or the mobile app. I went and setup my presets so it looks at my gate, driveway, garden, walkway and the front door. All these places also have cameras already so this is just extra coverage for the existing cameras with some gaps filled in based on where I placed this PTZ. Out of the 9 locations you can setup as presets I'm using 4 of them in the tour.
How to get Home Assistant to talk to Unifi Protect
Go into Settings > Devices & services > [Add Integration] and add the Unifi Protect integration. This will give you all your ententies for each of your camera devices so you can utilize the motion and people detection to be used in your automations. One thing that is missing in all of this is actually accessing the PTZ controls from this integration. I'd imagine at some point this will get added but for now we have to talk directly to the local API to access these controls.
Getting PTZ functionality into Home Assistant
I came across this post Better support for PTZ State / PTZ Presets #436 and this post as well Integration/unifiprotect/ptz state #142129 and then found this one Unifi Protect PTZ Control Implemented!! which really made me happy since it outlined how to control the PTZ by making input_buttons for each of the presets utilizing a bash script to act as the go-between for accessing them. If you follow these steps on this post you'll end up in a place where you have 10 inputs, one for each preset as well as a home preset so you can control your camera.
Backend setup for Home Assistant
Based on the Unifi Protect PTZ Control Implemented!! posts on Reddit you need to do the following to setup your PTZ controls.
Create a file in the path and give it execute permissions. <homeassistant>/config/custom_scripts/unifi/ptz/ptz_preset_control_camera.sh
Update your configuration.yaml to reference where your saved the script
Add this to your configuration.yaml so you now have the shell command called "ptz_preset_control_camera" that you can pass the various value to.
  shell_command:
  ptz_preset_control_camera: "bash /config/custom_scripts/unifi/ptz/ptz_preset_control_camera.sh {{nvr_ip}} {{username}} {{password}} {{camera_id}} {{preset_number}}"
Write an automation
This bit is stolen from the reddit post but I might as well add it here so its in one place.
To get your camera id simply navigate to recording manager in Unifi Protect and then click on your PTZ Camera. Look at the URL bar and grab the value after the cameraSelector= (it should be 24 characters long, no spaces and alphanumerical)
Replace the values for nvr_ip,username,password,camera_id,preset_number
preset_number:
-1is home position0is Preset 1 as shown in Protect GUI1is Preset 2 as shown in Protect GUI2is Preset 3 as shown in Protect GUI
Protect supports up to 9 presets! Just add more than the 3 views listed below and the 3 actions so you have a total of 9
Writing the Automation for the Tour
This is where I come in with how to go about adding an automation that will switch between each preset. The first automation is to direct the PTZ to go from one preset to the next and skip a few that aren't required for my yard.
I currently have my camera set so that every 5 minutes it will do a tour of the yard and then go back to monitoring the home location until the next 5 minutes.
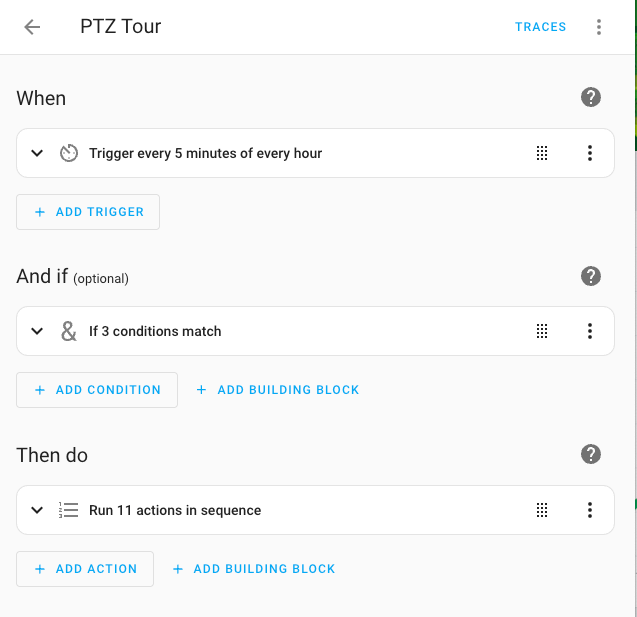
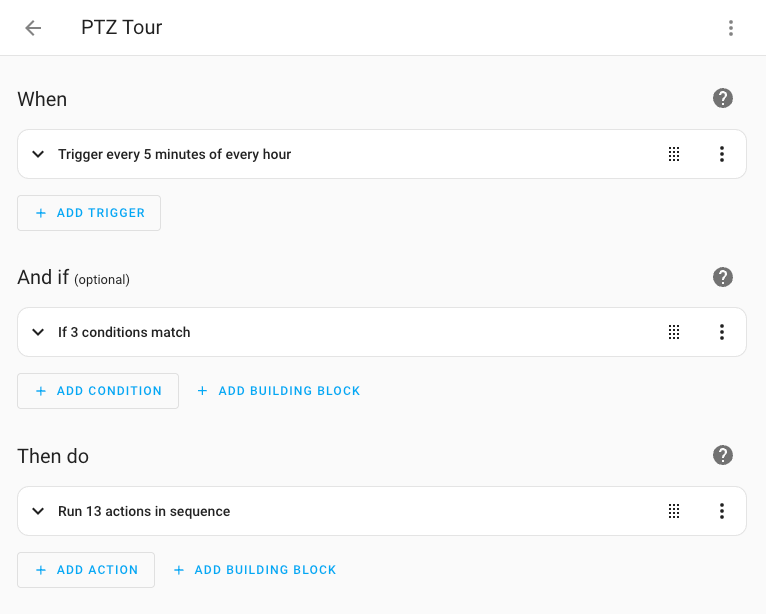
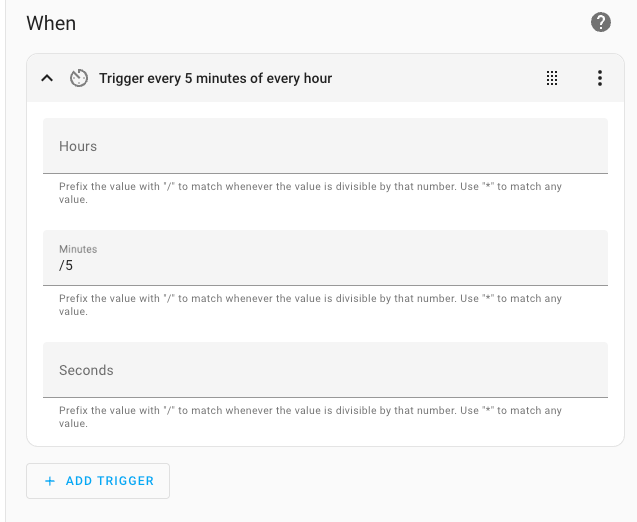
When
in the When section I have a 5 minute timer to kick off the tour.
And if
I have other cameras on the property that the PTZ is able to see, by giving it some eyes in the back of it's head I can use the status of the other cameras to see if I need to have the PTZ look there or not. If there is no motion on the other cameras then every 5 minutes it will do the your

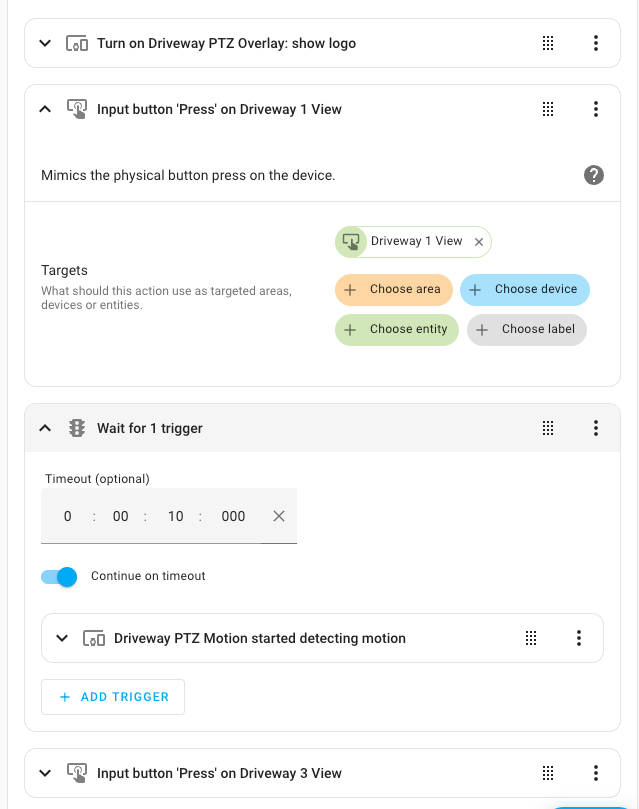
Then do
For the Then Do section I have a few things happening. I'm using the Logo on the camera as a way to know if its in tour mode or not. I turn it on then step through the "pressing" of the preview button then waiting a set time and pressing the next button.
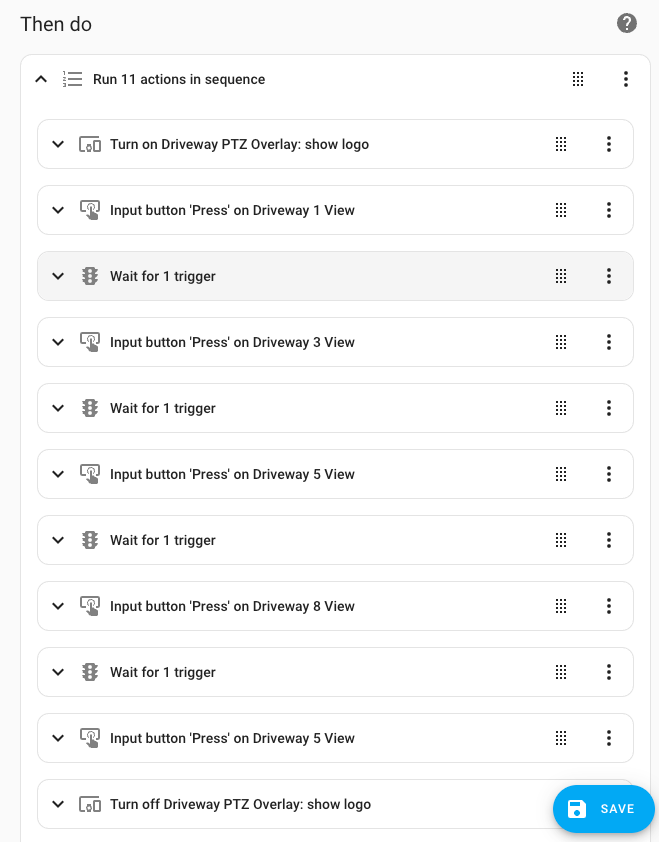
The logo part is optional but it's the only way I can see if the camera is in tour mode or not. I have it move, wait 10 seconds and the see if there is any motion then move to the next one.
At the end I have it turn off the logo for testing purposes.
Bonus Content: Making a Dashboard with controls
You'll also want to install the Advanced Camera Card by going to Home Assistant > HACS > Frontend > "Explore & Add Integrations" > Advanced Camera Card this card lets you see the camera and has a bunch of other features I havent tapped into yet. Once you do that you can then crate the new dashboard.
Create a new dashboard in Home Assistant Settings > Dashboards > [Add New Dashboard] start from scratch and then click the 3 dots in the upper right and open the "Raw Configuration Editor" and paste this in so you have a place to start.
In conclusion
If you know of a better way to do this? I'd love to hear it. This is my first attempt at this and I thought I'd see what I can come up with. Is this fully tested? Nope, will it change? Most likely. Let me know here, or on social media where you saw this posted because I'd love to see this done a few different ways.