
Teaching an old fan new tricks
How I replaced the controller in my old ceiling fan giving it new life in my smart home

My wife Jen lets me know the ceiling fan in our bedroom stopped working. I always wanted the fan and light in that room to be smart, a long while back I bought a Bond device that would blast IR and RF to change the state of a device but it never knew its current state. Just blindly yelling into the void "TOGGLE LIGHT STATE" and it could be on or off, who knows. I figured since the fan AND the light stopped working its most likely not the fan motor it must be the controller. I searched around looking for a fan controller box I can swap out that will let me set the state of the fan, not toggle it and can also be used with Home Assistant and ultimately Apple HomeKit which is where my wife controls stuff on her phone.
What did I get?
So for this setup I went with a Sonoff iFan04 which lets me control the fan using an app, it comes with one called eWeLink which is ok but not for me. I used that app for the initial setup then to add it to Home Assistant and Home Kit. I installed the Sonoff integration that AlexIT is maintaining, SonoffLAN as long as you have the latest firmware installed. I let the eWeLink app do the firmware update then enabled the DIY Lan option so the device can be controlled locally not using the cloud. Configuration > Integrations > Add Integration > Sonoff and my device was added to Home Assistant and with my fan tested I put the fan back together and noticed that for whatever reason Sonoff thought it was a good idea to put a buzzer in the device so every time you press the button it makes a noise! BEEP!
What is that beeping?
Each time you press a button it makes the device beep. Lets say its 3am and you roll over press a button and change the speed of the fan, both you and your partner hear BEEP each time a button is pressed. Nope, not on my watch.
So I have a few options to deal with this, one is to physically do something to the buzzer on the board either with hot glue, super glue, desolder the buzzer or just crush it with pliars. I've heard reports from folks online that if the wifi signal fails it may start beeping too. That sounds awful. I've heard of folks flashing the device with Tasmota or even editing the esphome using something like https://github.com/rh1rich/esphome-ifan04 but I havent explored that. I contacted Sonoff to see what they recommend before I go and pull the buzzer.
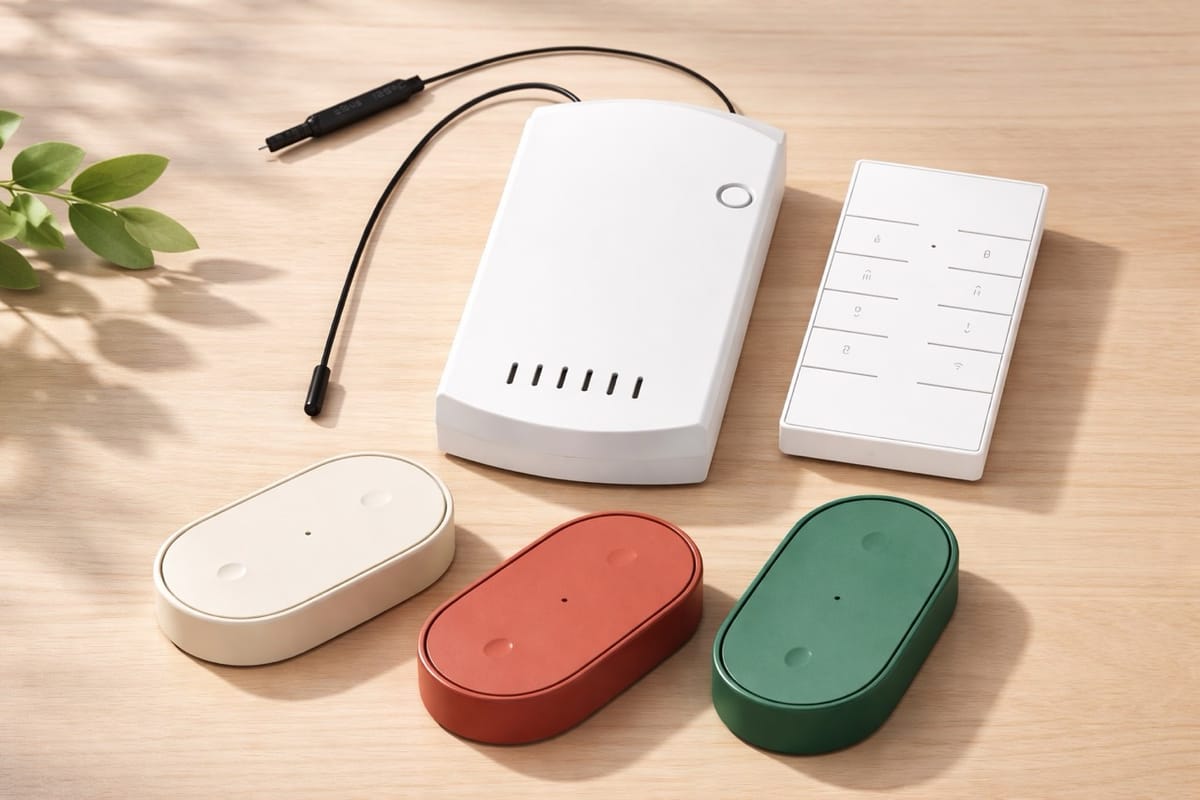
I need a physical remote
Ikea started selling this awesome Ikea Bilresa Dual Button Remote (or in a 3 pack) which is a simple 2 button remote which runs Matter over Thread. To setup this remote and if you are like me using both Homekit and Home Assistant you scan the QR Code on the back of the remote while in the Apple Home app then add the device there. Assign the device to a room and then open the room. You should see the device under the Other area at the bottom, tap the device and scroll to the bottom and tap on Turn On Pairing Mode and a code is presented. You can use that code to add this device in Home Assistant and the current state will be synced between the two ecosystems via Matter.
This remote is kinda awesome, it has 2 buttons and each button has 3 states. Press, Double Press, Press and hold. Here is my setup:
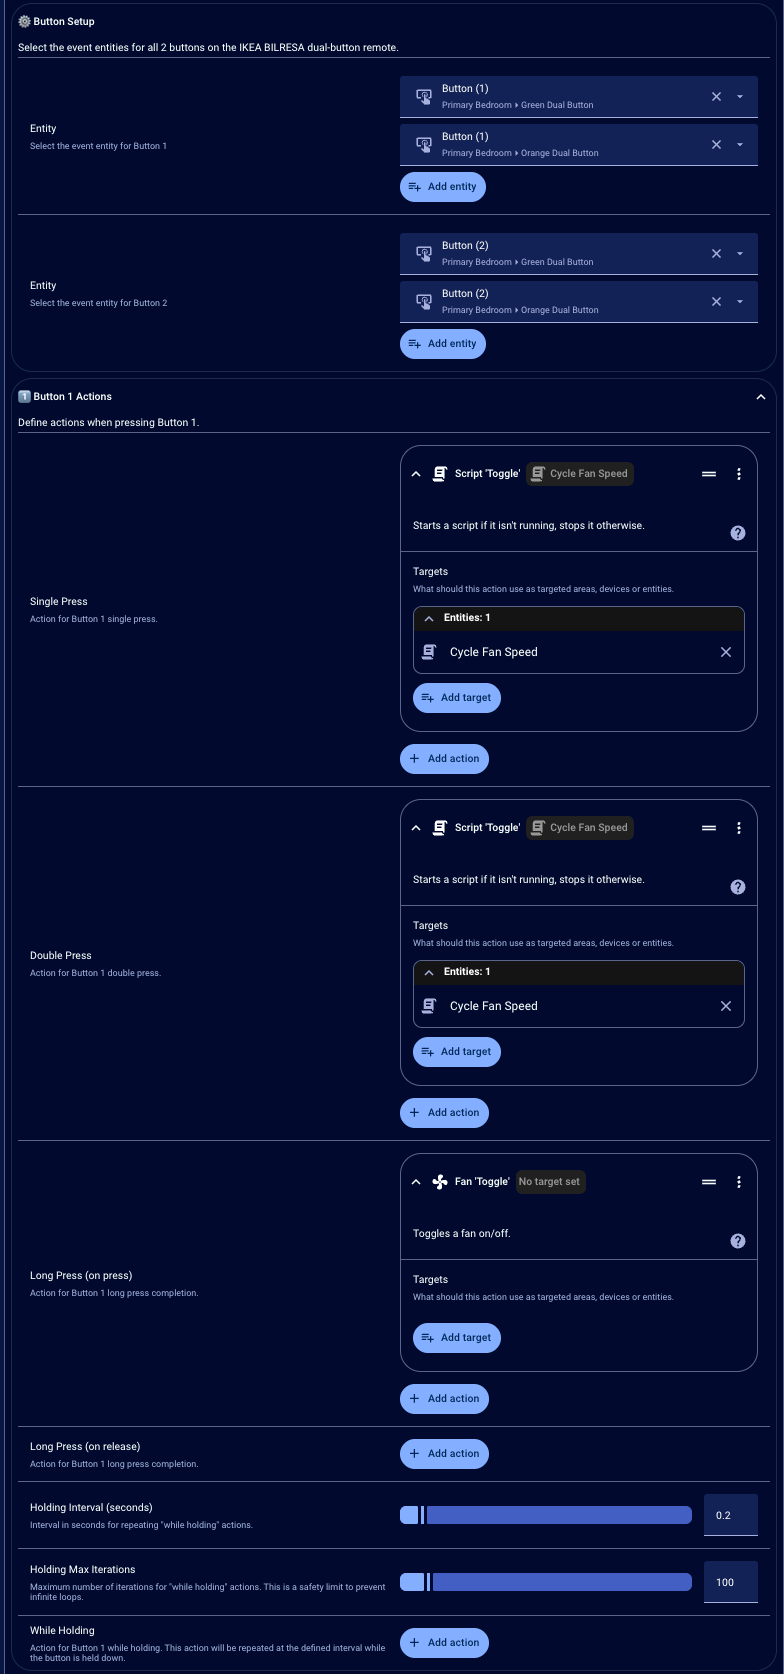
Button 1 - Fan
- Each Single Press - High, Medium, Low, Off
- Double Press (just in case, same as single press) - High, Medium, Low, Off
- Press and hold - Off
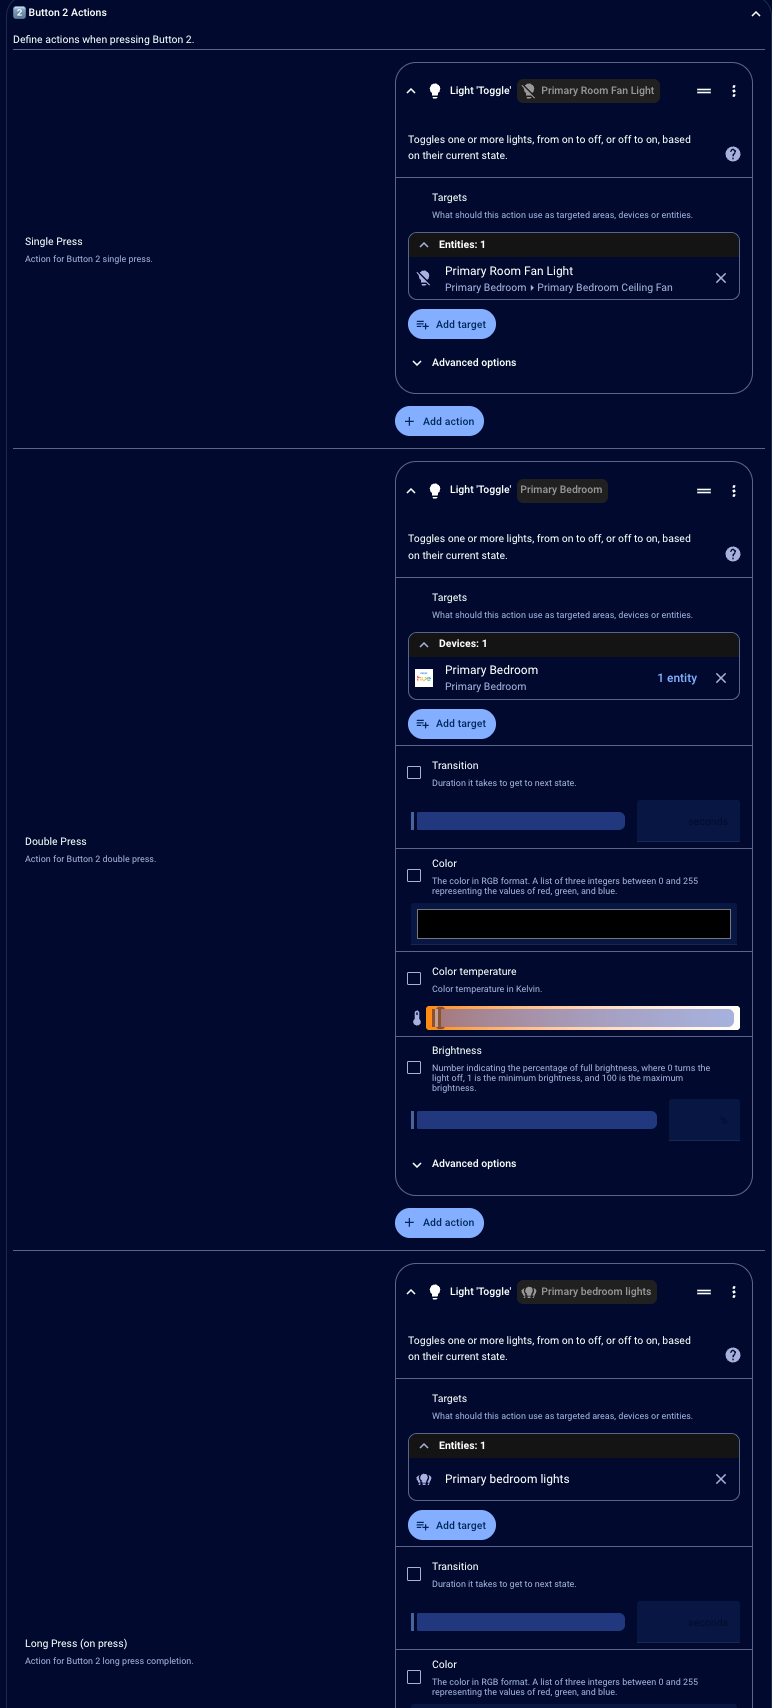
Button 2 - Lights
- Single Press toggles fan light
- Press and hold toggles all lights in the room
So in order to set this up I needed a way to cycles through the settings and this device has the state named: off, low, medium, high. I setup a script and added it to Home Assistant
- Go to Settings → Automations & Scenes
- Click the Scripts tab
- Click + Add Script (bottom right)
- Click the ⋮ menu (top right) → Edit in YAML
- Paste the entire script code
- Click Save
Here is the vibecoded script I used to cycle through the fan speeds:
alias: Cycle Fan Speed
fields:
  fan_entity:
    description: The fan entity to control
    example: fan.bedroom_fan
sequence:
  - choose:
      - conditions:
          - condition: state
            entity_id: "{{ fan_entity }}"
            state: "off"
        sequence:
          - target:
              entity_id: "{{ fan_entity }}"
            data:
              preset_mode: low
            action: fan.set_preset_mode
      - conditions:
          - condition: state
            entity_id: "{{ fan_entity }}"
            attribute: preset_mode
            state: low
        sequence:
          - target:
              entity_id: "{{ fan_entity }}"
            data:
              preset_mode: medium
            action: fan.set_preset_mode
      - conditions:
          - condition: state
            entity_id: "{{ fan_entity }}"
            attribute: preset_mode
            state: medium
        sequence:
          - target:
              entity_id: "{{ fan_entity }}"
            data:
              preset_mode: high
            action: fan.set_preset_mode
    default:
      - target:
          entity_id: "{{ fan_entity }}"
        action: fan.turn_off
Setting up the remote
To use this remote to its fullest in Home Assistant the easiest way to do it is to use this Blueprint for Ikea Bilresa Dual Button Remote that has all the button presses setup. I went to that site and clicked the import blueprint button and added it to my home assistant. From there selected the 2 buttons I wanted to configure and got things working using the Cycle Fan Speed script to do the speed toggling and toggle light to do the light toggling. Since you have 3 states per you can set those up how every you like. Also if you have 2 sets of buttons (I have a green and an orange one on either side of the bed) you can configure them together like I did here.
With all this setup I now have a fan that can be controlled with the remote it came with, the Ikea remotes or can be controlled from Home Assistant or HomeKit app. I could with Home Assistant using the temp sensor in the room change the fan speed to cool the room down as well. There is a lot to do with this and I'm looking forward to having a more streamlined and predictable setup going forward.